Remember the Ticket Booth I talked about yesterday? That was actually an afterthought this year, an idea I came up with as I was developing the primary project: a full-size, functioning marquee!
Katie and I had a wooden pergola installed over our garage door earlier this year, and since that’s the side of the house where our Halloween party guests would be entering, I wanted to give them something cool to see when they arrived. Cool idea, right?
Right?
Right.
Much like the ticket booth, I had no idea what I was doing, but that’s rarely ever stopped me before. Like many of my ideas, it started in my notebook.
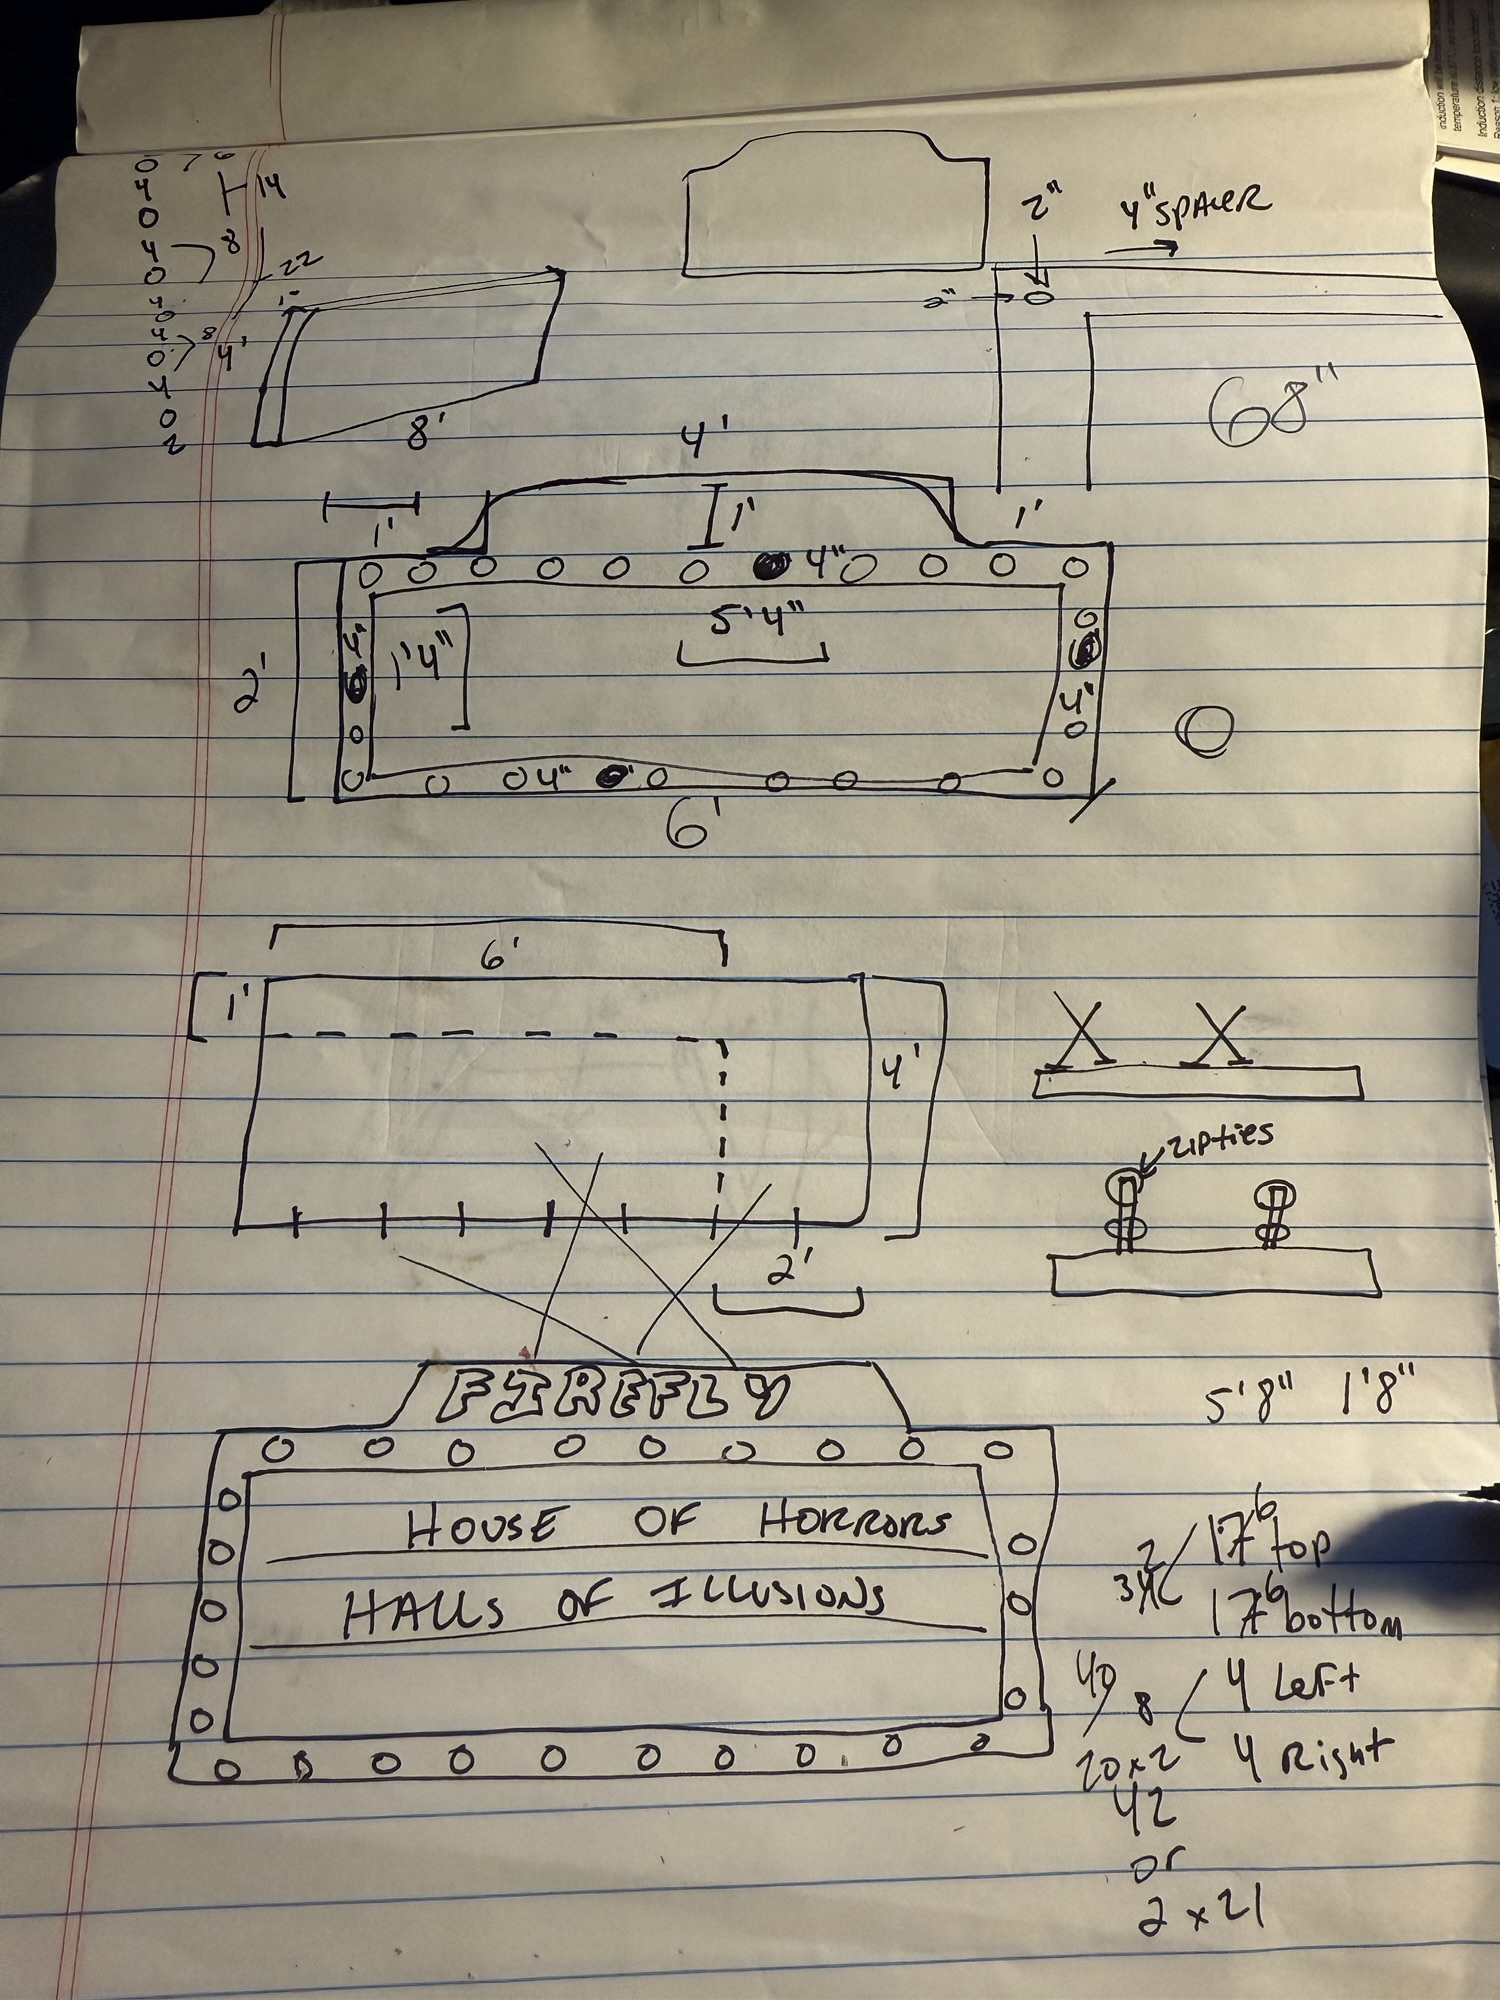
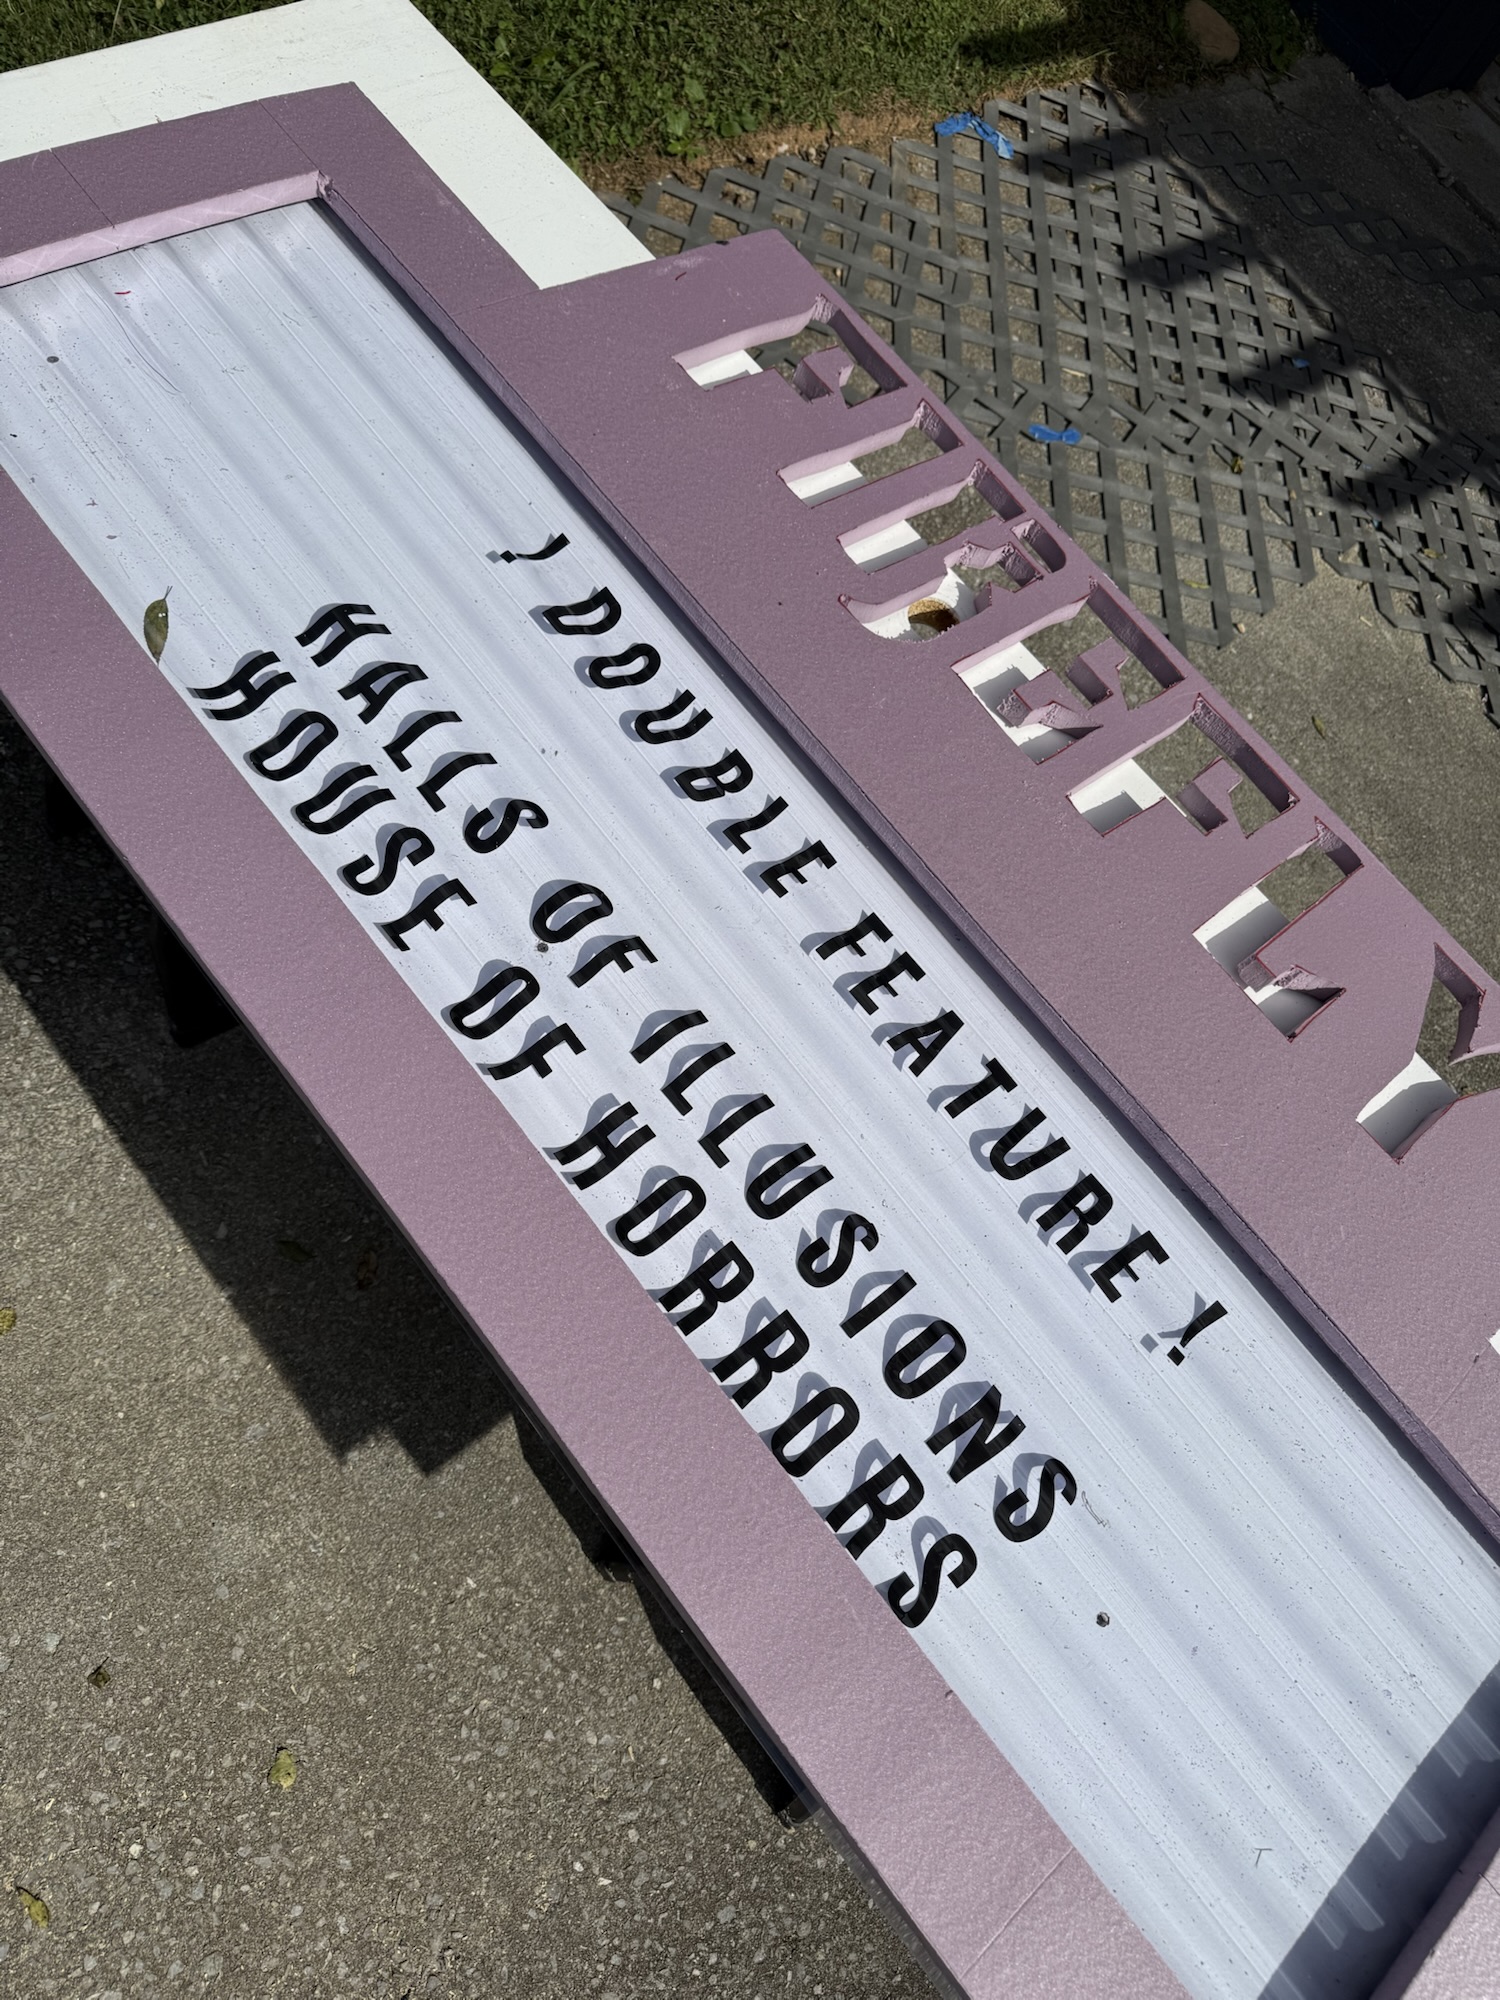
I’d gotten interested in prop making with foam insulation boards when we were planning for the party that we didn’t throw last year, so I knew that’s what I wanted to build this from. FOAMULAR NGX F-150 Rigid Foam Board Insulation comes in at 4’x8’, so I knew I could safely create a sign that was 6 feet wide by about 4 feet tall. My design included a slightly cut-out portion at the top that would house my cinema’s name FIREFLY that would be back-lit and color-changing, round lights around the perimeter of the marquee proper and, of course, a place to put the faux movie titles.
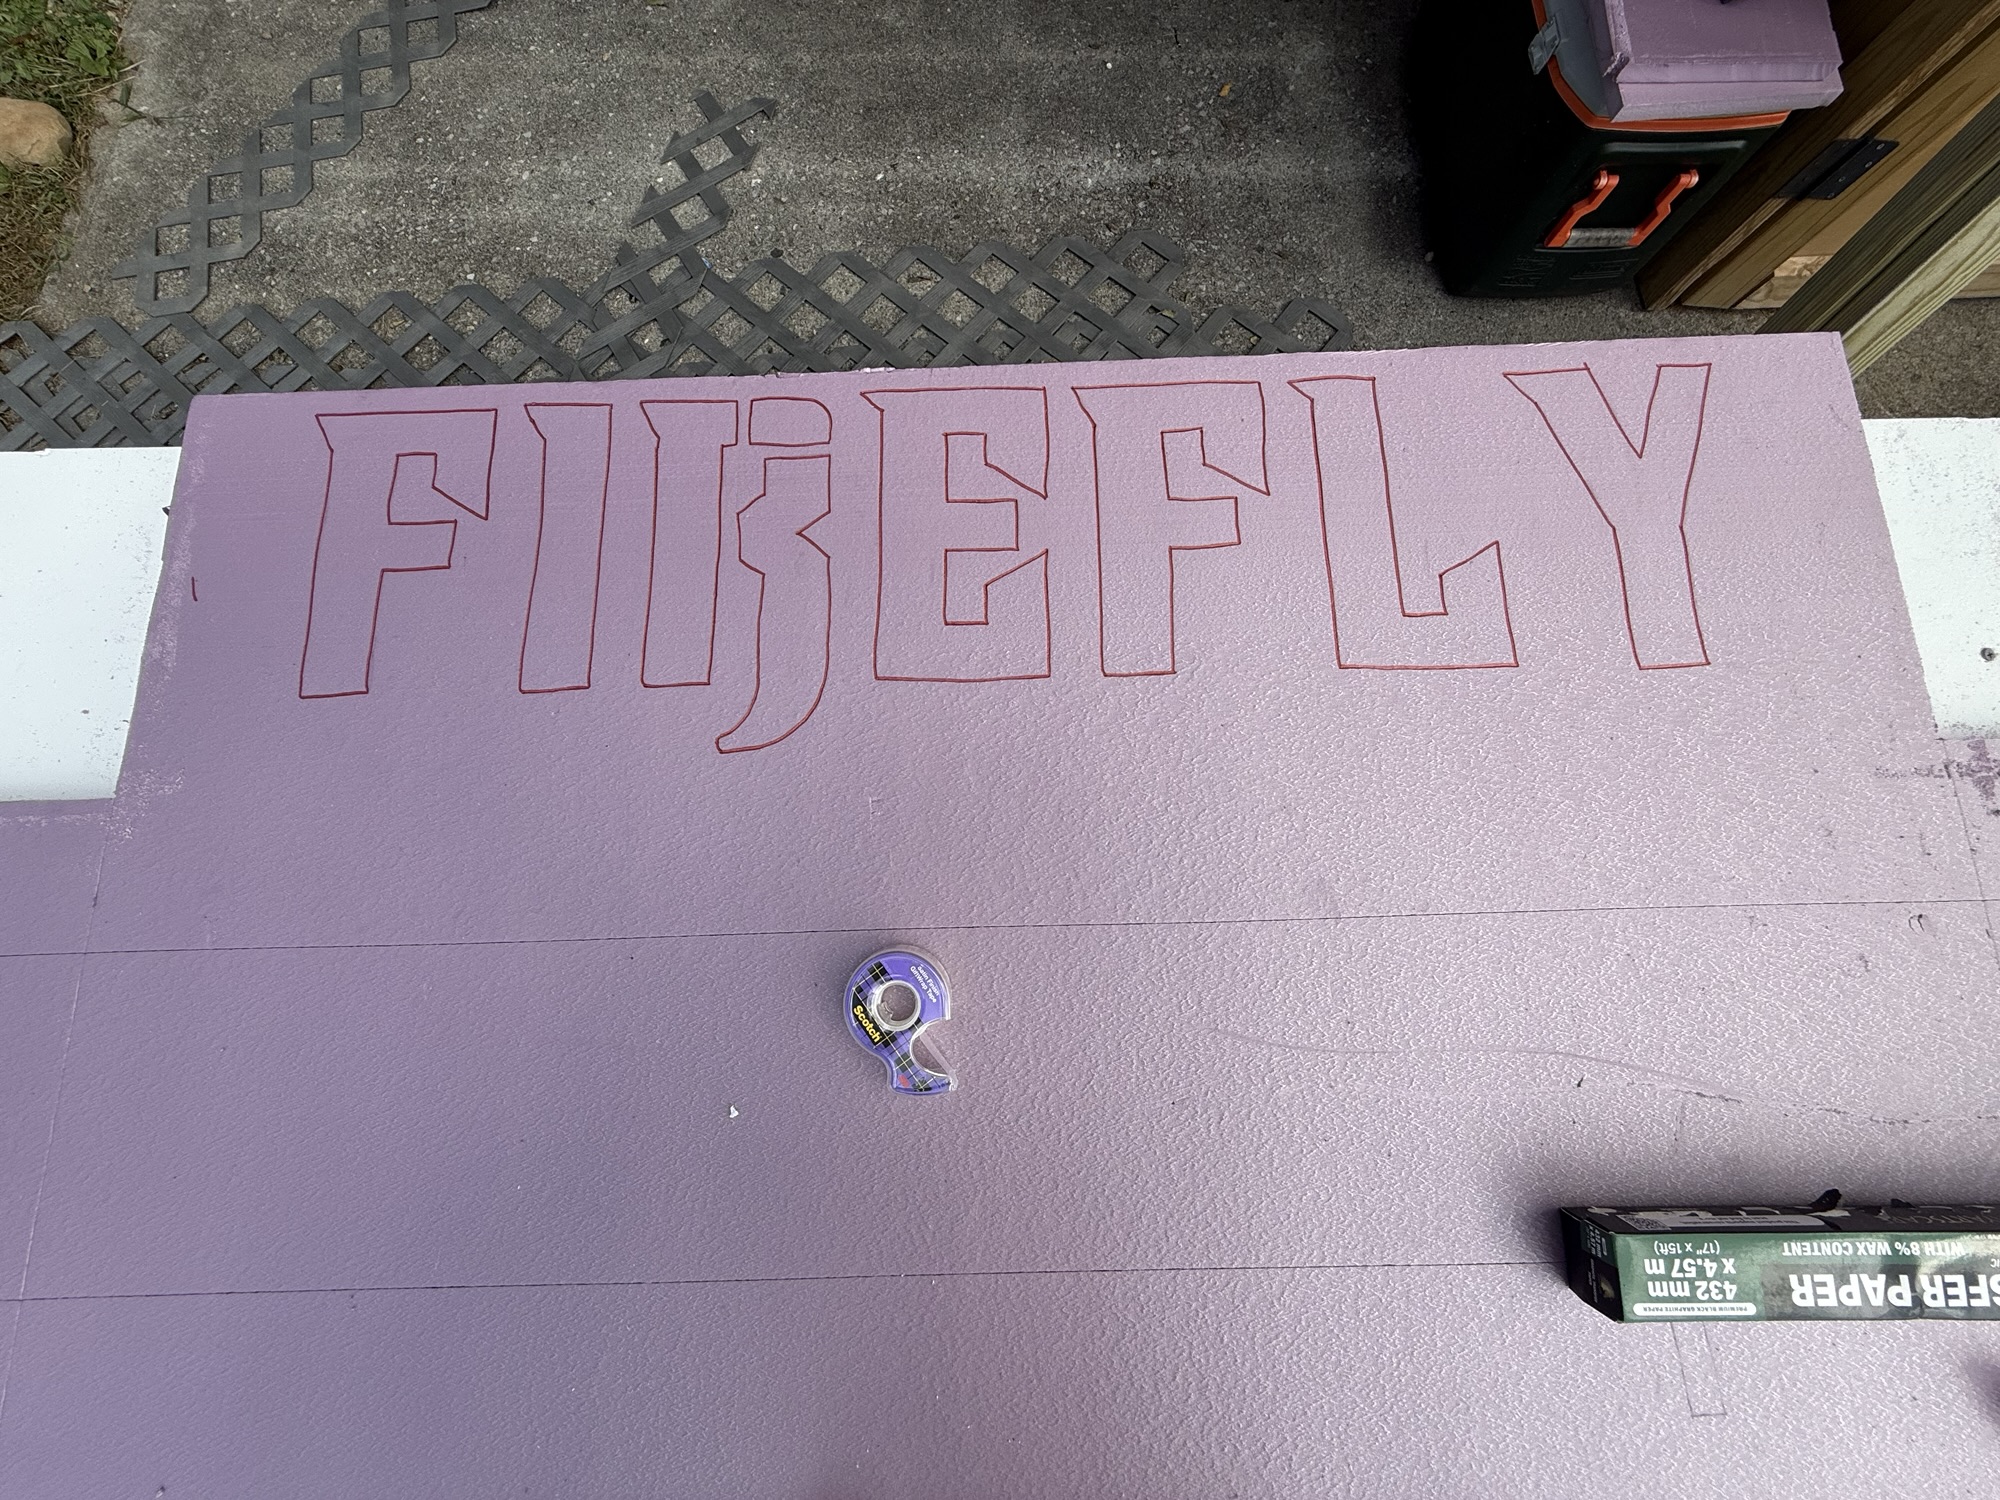
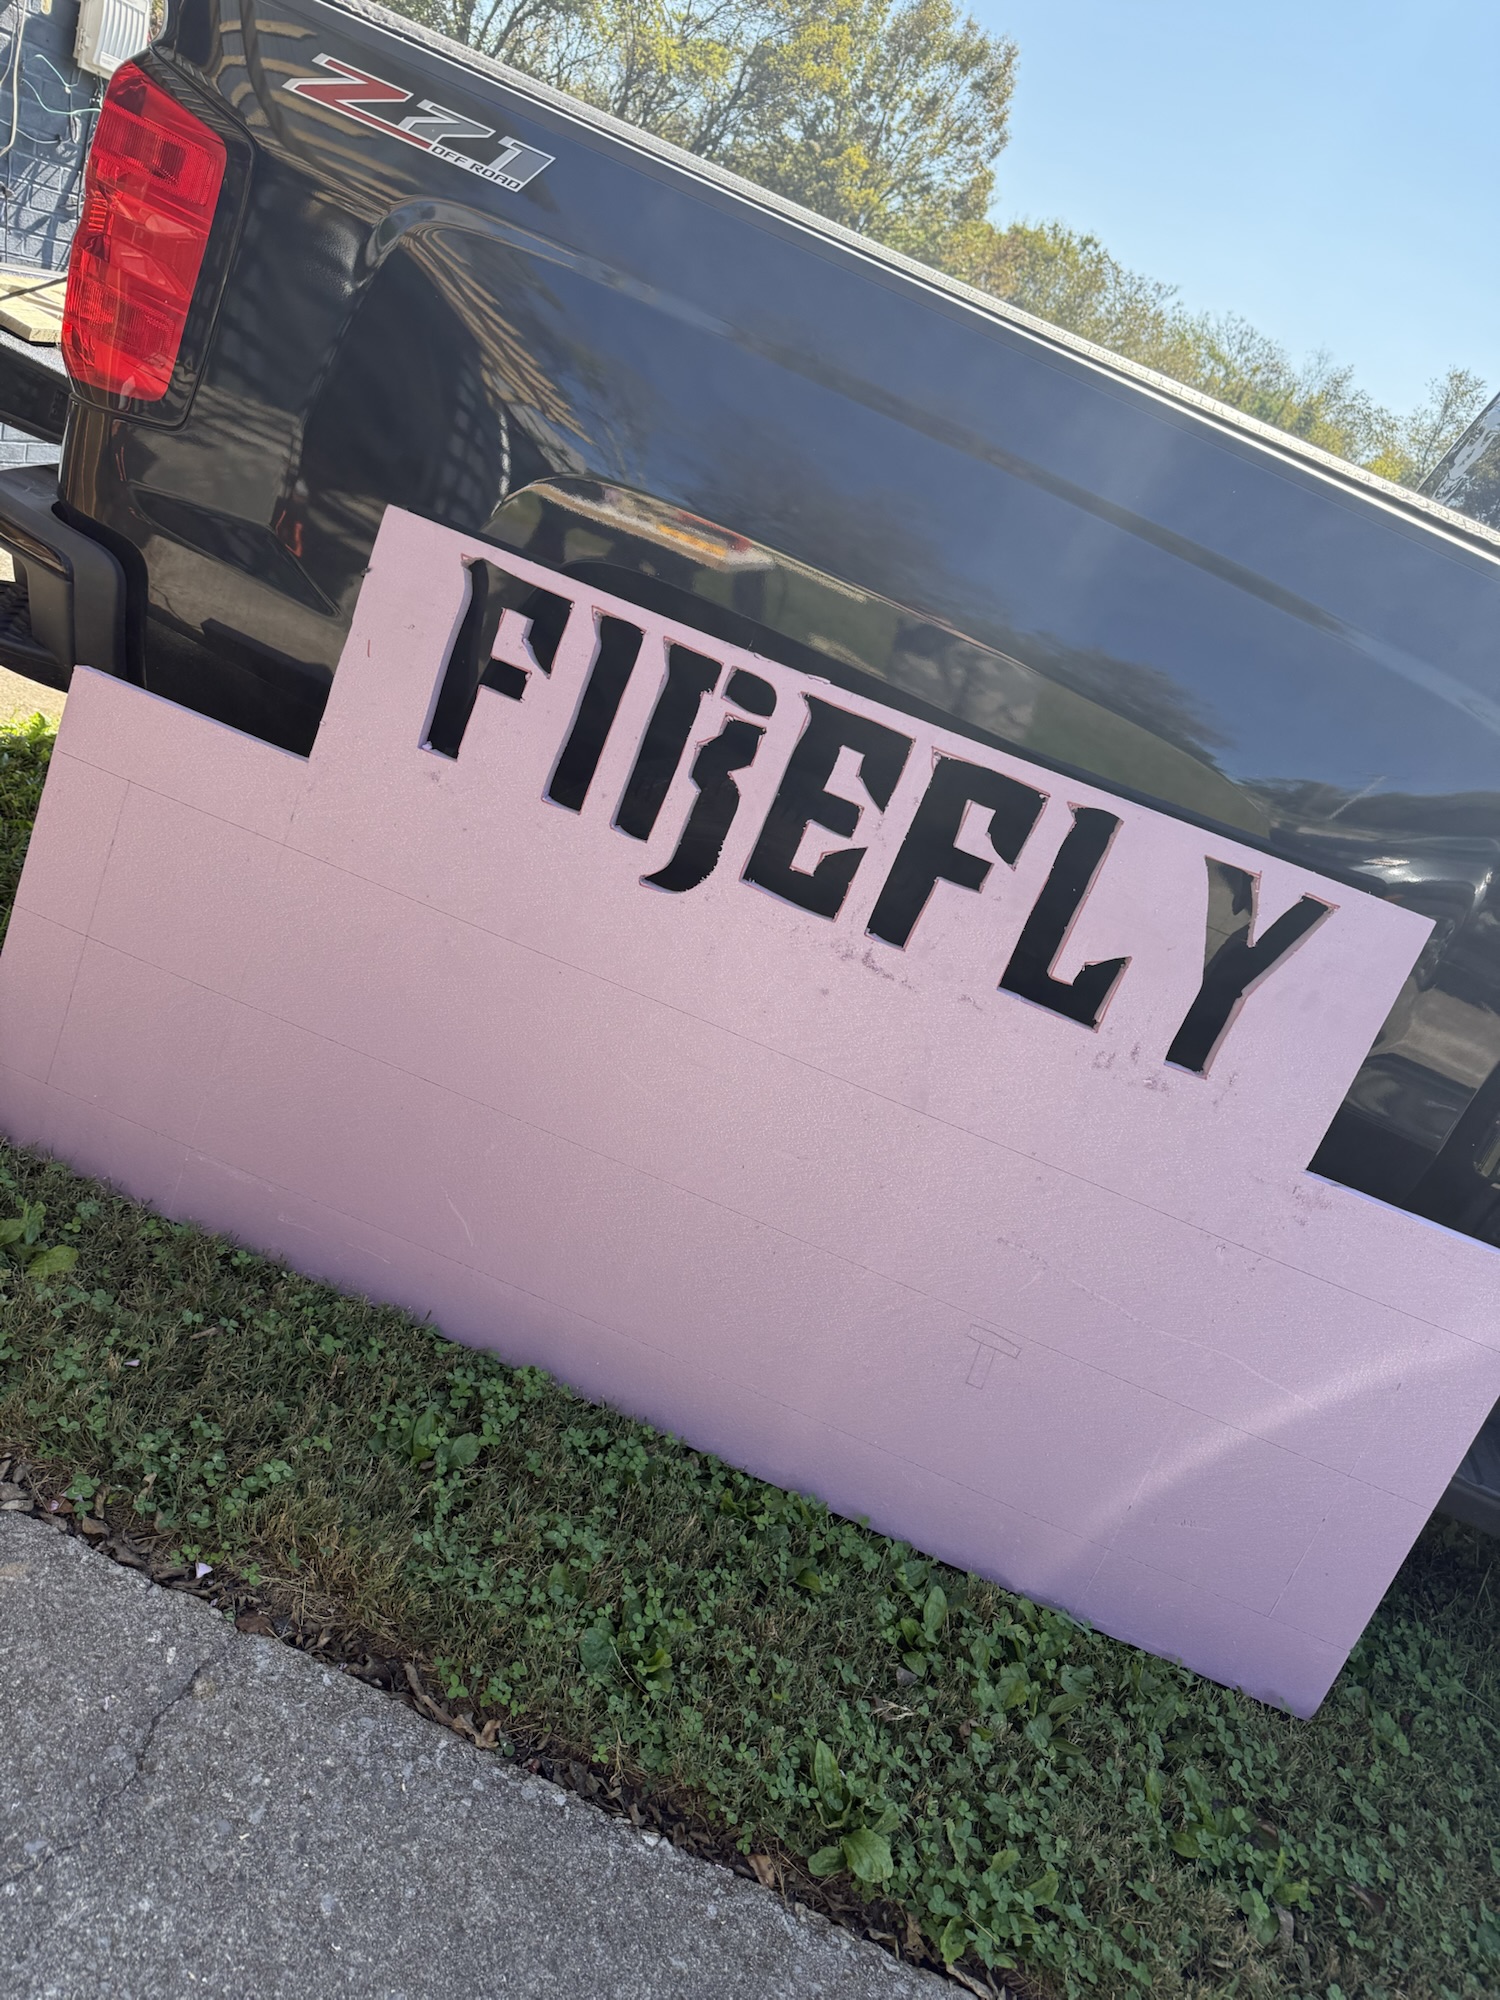
I started out by cutting the top two corners out to give me a logo space that would be “stacked” at the top with a size of 4’x1’. I then cut out the letters using the exact same method I used on the ticket booth: designed in Photoshop, printed, cut, traced with graphite paper, traced again with red Sharpie, then cut out with a jigsaw.

I cut out a large rectangle in the center of what was left where the marquee could live, being sure to leave a four inch border around the edge. I looked up actual marquee material and learned it’s absurdly expensive, so I went with a DIY method, choosing to pick up this Corrugated PVC Roof Panel in Clear instead since it’s similar in shape. For the letters, I picked up these 3” Adhesive Vinyl Letters from Amazon, designed the marquee lettering using Impact font in Photoshop, printed and laid it out under the plastic, then applied the decals appropriately.
Our “!Double Feature!” included “House of Horrors” and “Halls of Illusions” – both ICP songs, of course.
Let’s Light This Punk
Before painting, I drilled out 40 holes at regular intervals around the edge where my lights would fit. I also used extra bits of foam board that I’d cut off earlier to assemble a light box to hold the color-changing LEDs for the logo.
For the perimeter, I chose to go with four strands of these Outdoor String Lights since that provided me the setup I needed. I knew I wanted the lights to “chase” around the edge, so I picked up this Two-Channel Build Up Controller from The Christmas Light Emporium. It’s a very handy device that allows you to plug one strand of lights into the first channel, the other strand in the second channel, then the box switches back and forth between the two.
I connected two strands together and popped those lights into every other hole, then connected the other two strands and filled the gaps. This means the lights were organized in a 1-2-1-2-1-2 pattern, therefore when the switcher goes back and forth, the chase effect is born!
My light box at the top was built almost exactly like the Ticket Booth with Mylar Sheets forming a diffuser over the letters, the inside lined with aluminum foil and a strand of color-changing LED strip lights running along the edge. The main differences are there aren’t any hinges and I needed to actually attach the box to the back of the board. This presented two problem to solve: you can’t exactly just screw foam to foam, and it would also make the sign top-heavy.
On Adhesives …
I also needed to figure out how I was going to make the plastic hold itself in place, since I hadn’t really thought that one all the way through. Fortunately, your humble narrator sometimes has a few good ideas.
For the light box, I used Liquid Nails to initially hold the box in place at the top of the sign, then went around the edges with spray foam for reinforcement.
For the plastic marquee lettering, I cut off one-inch strips from some spare foam board, cut a rabbet out of the back and painted them metallic silver. I then used Liquid Nails to affix them symmetrically along the front edge, thereby giving the plastic something to rest against in the front. I then layered in the plastic sheet from the back, ran a strand of white LED strip around the edge, then laid on the back panel (lined with aluminum foil for reflection). Unfortunately, there wasn’t enough depth to the void in the sign to accommodate everything, so I used my old friend spray foam to act as both adhesive and gap-closer around the edges.
The only problem with using the spray foam is that once it’s cured, it’s in place. When both the box and the back panel had cured, I propped the sign up and plugged everything in to find that my white LEDs weren’t working. I’m not entirely sure why – they worked when I tested them – but I have a feeling I may have been too rough with them while installing.
Whatever … I reasoned that maybe my perimeter lights would provide enough light to adequately display the lettering. They kinda did, but I also had an issue with one of my strands of lights as well. Not sure if it’s a bad strand altogether or just a short, but ¼ of my lights didn’t function after installation.
It still looked pretty cool, though, and we reasoned that the short only made it look more authentically like an old movie theater marquee.
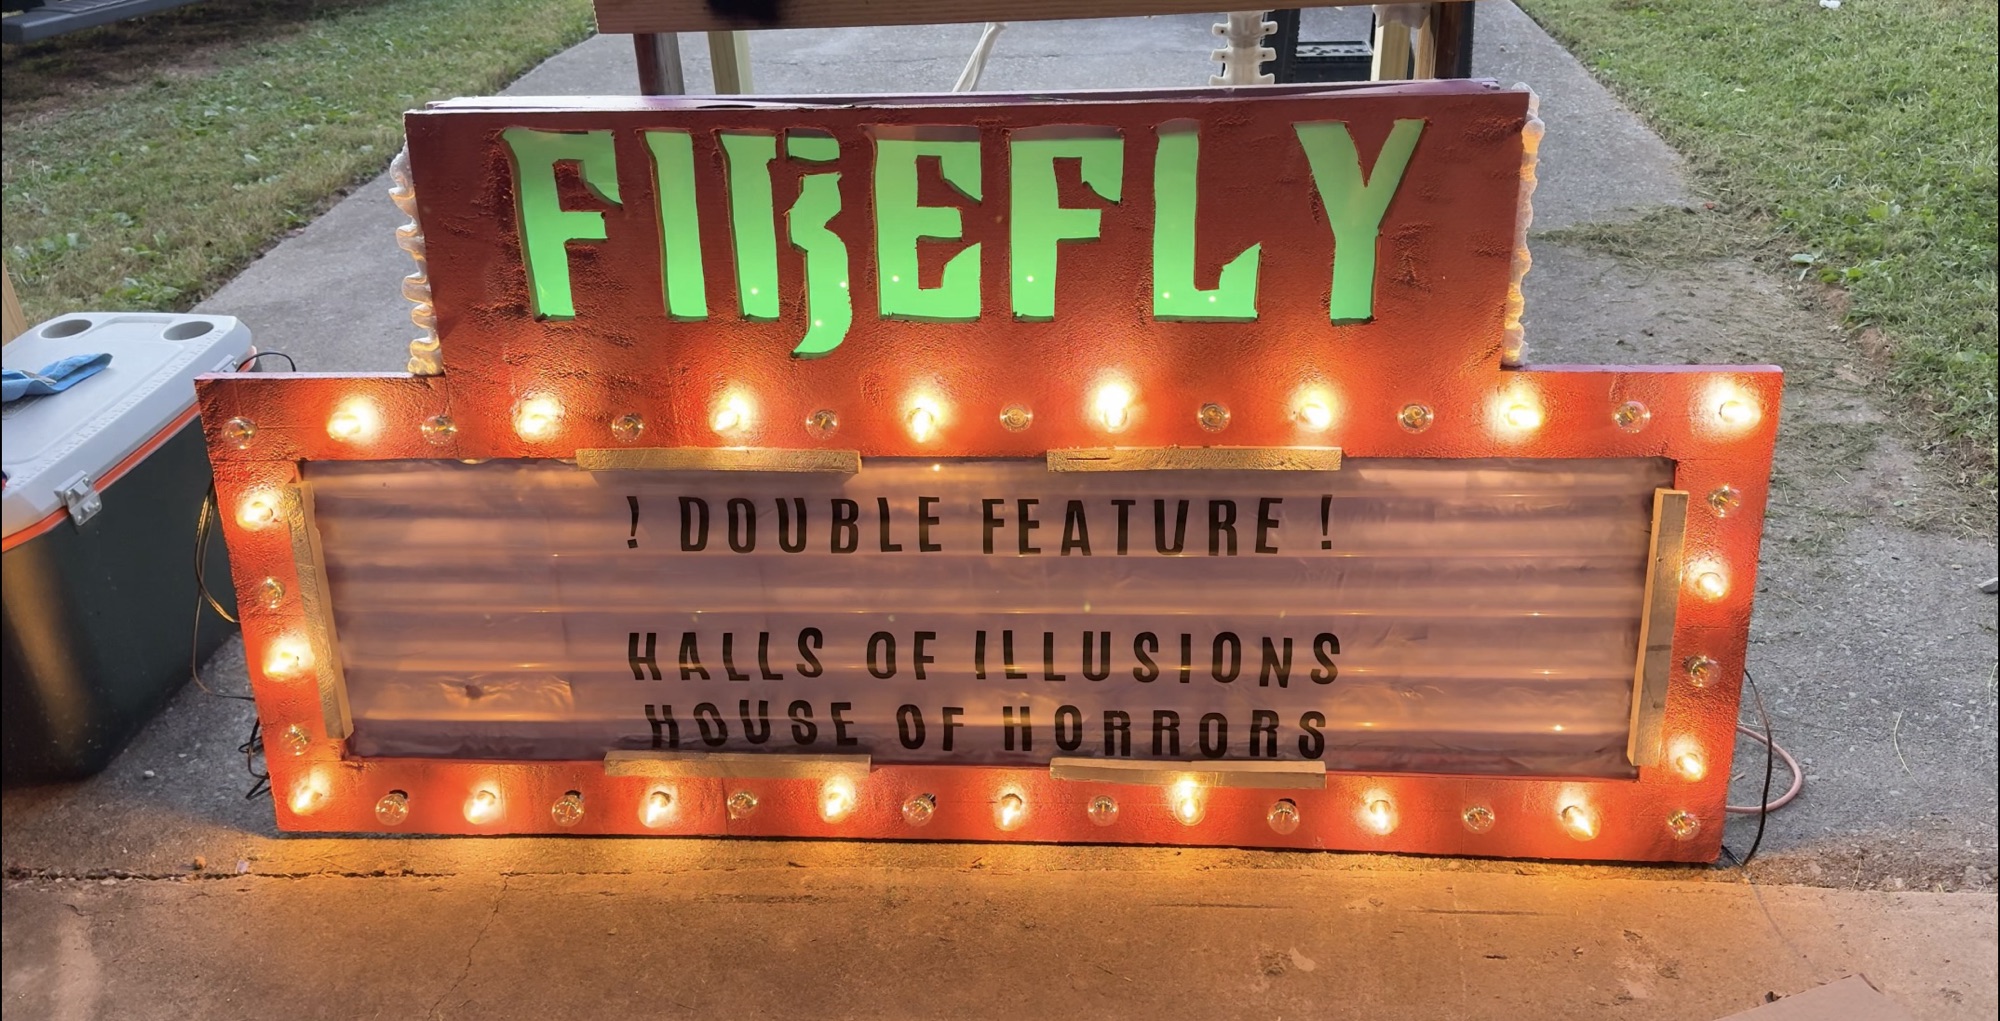
Some great news, though, is that the FIREFLY sign looked dope! I was very pleased with that!
The day before the party, I rigged up a simple prop to hold the sign in place atop the pergola, then carefully installed everything. Somewhere along the line, more of my bulbs shorted out, which made it nearly impossible to see the words of the sign, so I improvised by creating a makeshift spotlight from a high-speed strobe we had kicking around in the garage.
It maybe wasn’t exactly what I’d hoped for, but it ended up being pretty cool and I was still very proud of what I’d built.
Demise
A few days after the party, some wind knocked my sign over and it fell off the pergola. We came outside to find it hanging from its wires, some bulbs busted and part of the corner crushed. Impressively, though, everything held together by liquid nails and spray foam survived the 10-foot fall! Still, the visual of my sign hanging helplessly from a few power chords was both heartbreaking and somehow appropriate.
I hadn’t planned on storing the sign anyway – rather, I was going to salvage the lights that still worked and scrap the rest of it. It served its purpose and I learned a lot. Those are the only things that matter.
Until tomorrow, dear readers …
-jtf
This is post 3 of 30 in my most recent attempt at tackling NaBloPoMo. Funsies and such.
